EDIT: The tutorial is now part of the official docs - Getting Started on Windows via WSL
So, this forum post won’t be updated anymore, but feel free to reply if you need help.
Howdy everyone, I spent some time setting up Monty and Habitat-Sim on WSL. I put together a complete tutorial based on my attempts, the TBP docs, and clues posted by other Windows users.
Let’s jump in:
-
Install WSL and Ubuntu, make sure to follow every step: Manual installation steps for older versions of WSL | Microsoft Learn
- Personally, I chose Ubuntu 24.04 LTS.
- The Linux filesystem can be accessed from Windows via the “Linux” section in the File Explorer, which points to this path:
\\wsl.localhost\Ubuntu-24.04\
-
From the Ubuntu terminal, install Miniconda:
mkdir -p ~/miniconda3
wget https://repo.anaconda.com/miniconda/Miniconda3-latest-Linux-x86_64.sh -O ~/miniconda3/miniconda.sh
bash ~/miniconda3/miniconda.sh -b -u -p ~/miniconda3
rm ~/miniconda3/miniconda.sh
source ~/miniconda3/bin/activate
conda init --all
-
Prepare Monty;
-
Fork the repo, as explained in Getting Started
-
Clone the repo, adjusting YOUR_GITHUB_USERNAME accordingly:
git clone https://github.com/YOUR_GITHUB_USERNAME/tbp.monty ~/tbp
-
Set up the conda environment, this will take a few minutes:
cd ~/tbp && conda tos accept && conda env create && conda init && \
conda activate tbp.monty
-
(optional) Set Monty as the default conda environment:
conda config --set default_activation_env tbp.monty
-
Install libopengl0 to allow Habitat-Sim to run:
sudo apt -y install libopengl0
-
Configure WSL to use the Windows GPU drivers:
echo "export GALLIUM_DRIVER=d3d12" >> ~/.bashrc && exec bash
(Side-note: Don’t install Linux GPU drivers, you don’t need them, and in some cases they even cause problems)
-
Download Monty datasets;
-
YCB dataset:
python -m habitat_sim.utils.datasets_download --uids ycb --data-path ~/tbp/data/habitat
-
Pretrained Models:
mkdir -p ~/tbp/results/monty/pretrained_models/ && cd "$_"
curl -L https://tbp-pretrained-models-public-c9c24aef2e49b897.s3.us-east-2.amazonaws.com/tbp.monty/pretrained_ycb_v10.tgz | tar --warning=no-unknown-keyword -xzf -
-
(optional) Monty-Meets-World Datasets:
mkdir -p ~/tbp/data/ && cd "$_"
curl -L https://tbp-data-public-5e789bd48e75350c.s3.us-east-2.amazonaws.com/tbp.monty/numenta_lab.tgz | tar --warning=no-unknown-keyword -xzf -
curl -L https://tbp-data-public-5e789bd48e75350c.s3.us-east-2.amazonaws.com/tbp.monty/worldimages.tgz | tar --warning=no-unknown-keyword -xzf -
-
Prepare VS Code;
-
The final challenge, run unit tests and a benchmark;
-
If you followed all the previous steps, normally you should have VS Code open on the Monty project, ready to go. Try running the unit tests:
This will take some time, about 10 minutes on my 8-core i7-11700K:
-
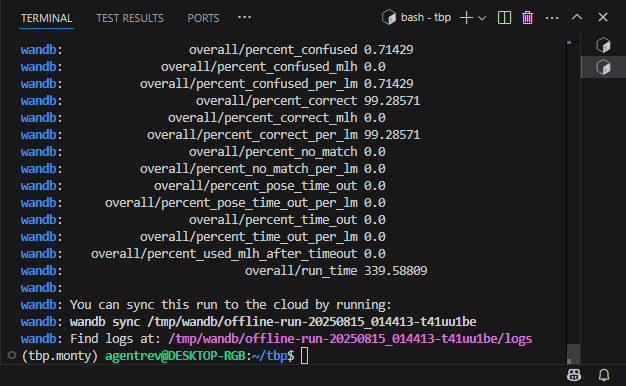
Finally, let’s run a benchmark. You can do this in either the Ubuntu terminal or directly in the VS Code terminal. In the VS Code top menu, select Terminal > Open Terminal, then enter:
python benchmarks/run.py -e base_config_10distinctobj_dist_agent
Choose option 3 - “Don’t visualize my results”
Took me a little over 5 minutes:
You’re now all set to start experimenting and contributing. If you encounter any errors, don’t hesitate to @ me.
Happy hacking!

9 Likes
Thank you @AgentRev, this is great, and appreciated!
If you’d like, you could link to this tutorial in our docs, where we tell people that getting started doesn’t work for Windows.
Or, if you’re up for it, create a sub-page for Getting Started on Windows via WSL.
Our documentation on contributing documentation is here.
3 Likes
@AgentRev
Thanks a lot this literally saved my life after a week of trying to install it with Claude.
So I did these steps and tried to run the code on the toturials and it’s working without errors but probably without results or visualization ( may be this because my weak technical skills but I tried to get it with the help of AI put I couldn’t).
Also when I tried to do step 6 from your tutorial and run the benchmraks it always gives this error :WindowlessContext: Unable to create windowless context, which is mostly because of WSL problems. I have been trying for days to solve these WSL issues but in vain. I am using Windows 10 so can this be the problem and should I upgrade to windows 11 and reinstall WSL?
I’d appreciate any help or guidance. Thank you.
@Ziad_Mohsen I’ve had the WindowlessContext errors too, I think this is caused by attempting to install Nvidia’s native Linux GPU drivers, which Nvidia recommends against. What I did is I deleted Ubuntu and restarted from scratch, installing only libopengl0, no Nvidia stuff, then it worked. Did you follow the tutorial using a fresh Ubuntu instance?
Edit: I managed to pinpoint the cause of the WindowlessContext error; this happened after I accidentally updated Monty’s Habitat-Sim. Avoid following Habitat-Sim’s GitHub instructions inside the tbp.monty environment, it will update you to v0.2.3, while Monty is only compatible with v0.2.2 for now. You can fix the problem with this:
cd ~/tbp
conda activate tbp.monty; conda uninstall -y habitat-sim; conda env update
2 Likes
Thanks for this tutorial. I must inform people that you can face issues trying to create environment on wsl. You may face the following -
Post conda create env, the Solving environment progresses for a while and then it stops with this error - Terminated or with Catastrophic error or Error 0x1
This is what helped me mostly.
I set wsl and the distro version both to 1.
wsl --set-default-version 1
wsl --set-version Ubuntu 1
1 Like
When I wrote the tutorial, I reinstalled WSL Ubuntu like 5 times to experiment and ensure everything worked properly from start to finish, and I solely use WSL v2. I’m fairly certain those errors are not related to the WSL version. The only time I got a conda error like that was when my PC ran out of RAM 
2 Likes
Aha true that. Did not think of this.
I must mention my tests ran only after I decided to install lubuntu. Thanks for this tutorial and have a great day
1 Like
Hi thanks so much for the tutorial!
It took me a couple of tries, but it worked. First, I reused a previous Ubuntu 22.04 environment and but I was not able to run the habitat experiment. I got the “cannot create core context, failing back” error:
glx: failed to create drisw screen
Platform::WindowlessGlxContext: cannot create core context, falling back to compatibility context: GLXBadFBConfig
Platform::WindowlessGlxContext: cannot create context: BadValue (integer parameter out of range for operation)
WindowlessContext: Unable to create windowless context
I tried downgrading habitta to v.0.2.2 version and other sugesstions here and in the web for dealing with opengl under wsl. Nothing worked.
I had to do two things:
- Avoid
export GALLIUM_DRIVER=d3d12 . BTW, I checked whether this step was needed by commenting and sourcing ~/.bashrc again, and it seemed not to update the change, so I had to create a new terminal.
- Install a new fress wsl environment, in this case Ubuntu 22.04.5
Now it works just fine! Thanks!
1 Like
Unable to create windowless context usually means the instructions were not followed properly.
Creating a new Ubuntu environment is pretty much mandatory. You must avoid manually installing Habitat-Sim, avoid following Habitat-Sim’s GitHub instructions, and avoid using the conda install command. If your Habitat was not v0.2.2 from the beginning, it means you did one of those.
conda env create automatically takes care of all dependencies, including Habitat v0.2.2 
The GALLIUM_DRIVER part is for the habitat-viewer executable if you want to test that Habitat works properly, but it’s not mandatory for Monty specifically. It is not the cause of that error.
1 Like
Thanks @AgentRev!
I tried again uncommenting export GALLIUM_DRIVER=d3d12 and I get the same error:
libGL error: glx: failed to create drisw screen
libGL error: failed to load driver: swrast
Platform::WindowlessGlxContext: cannot create core context, falling back to compatibility context: GLXBadFBConfig
Platform::WindowlessGlxContext: cannot create context: BadValue (integer parameter out of range for operation)
WindowlessContext: Unable to create windowless context
Comment that line, and it works again. So, it seems there is something in my WSL2 laptop drivers that is missing or incompatible with the habitat-viewer executable.
Just to be sure, do you know whether this should work in a laptop with an Intel integrated GPU: 11th Gen i7-1185G7? or does it expect Nvidia driver?
1 Like
Okay, I may have been a bit too quick on the trigger with my last sentence  I haven’t tested it with an Intel GPU, maybe their drivers don’t support WSL.
Since it’s not mandatory, I’ll take your word for it and will update the tutorial to remove it. Thanks for the report!
2 Likes